Chapters
- 1What is EmbroideryTrace?
- 2Create an account
- 3Sign in
- 4Upload your image
- 5Separate colours
- 6Use Trace
- 7Meet the Stitch Editor
- 8Choose a stitch type
- 9Set satin
- 10Edit shapes
- 11Save and reopen your design
- 12Pick your hoop
- 13Preview your design
- 14Export and stitch on your machine
- 15Free Plan and Pro
- 16Credits
- 17If something looks wrong
- 18FAQ
- 19Get help
When the preview looks right, download a stitch file from Export Embroidery. On the Stitch File tab, set Machine format — for example DST — Tajima (most universal) or PES — Brother. Other machine formats include JEF, VP3, and EXP. You can also use the SVG and PNG tabs if you need those formats.
Downloading a stitch file needs a Pro membership. If you are on the Free Plan, subscribe from Billing. The plan you pick is billed at checkout.
To export and sew
- 1
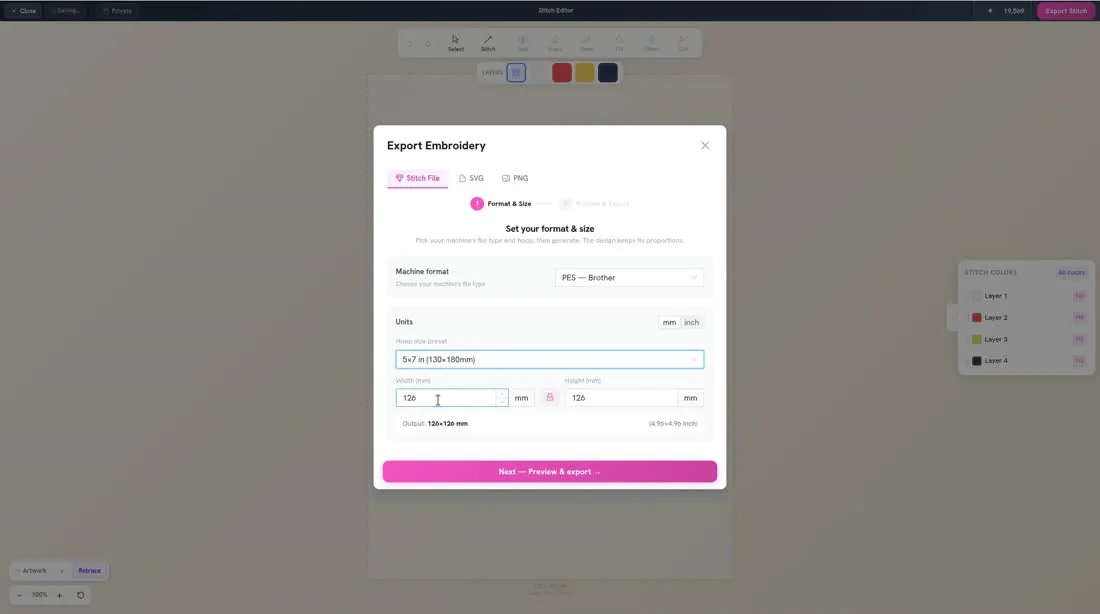
Click Export Stitch. On Format & Size, choose your Machine format and Hoop size preset, then click Next — Preview & export →.
- 2
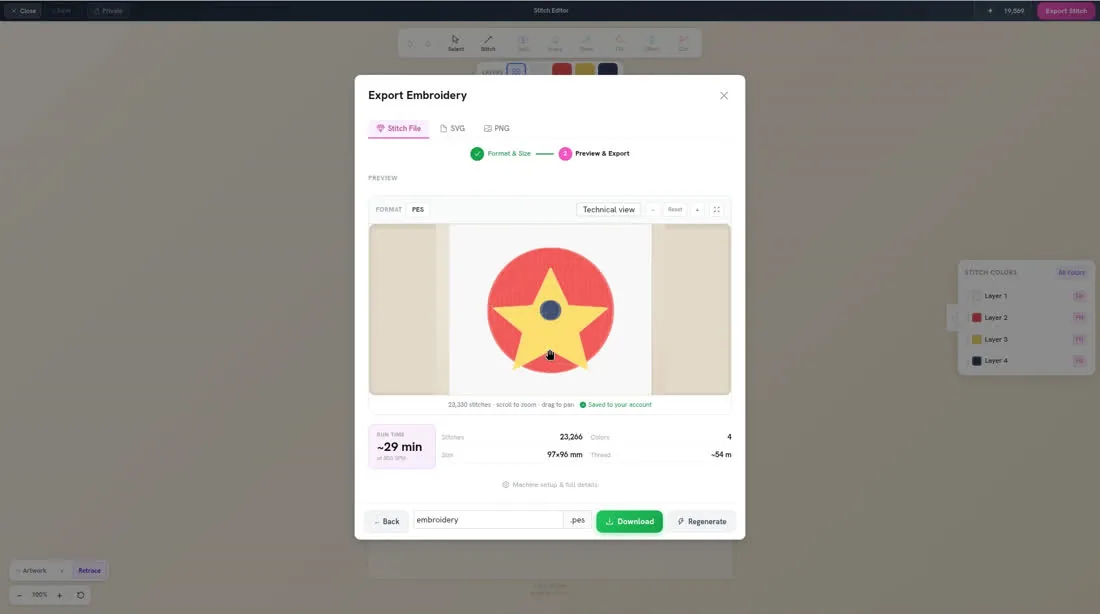
Click Generate Stitch File. This usually takes under a minute; complex designs can take several minutes. When the preview looks right, click Download. Use Regenerate if you change something and need a new file.
- 3
You will see a confirmation when the file has downloaded. If you are asked Share this design?, choose Share to community or Keep private. Then copy the file to your embroidery machine and stitch it as you usually would.